Perform Interactive ML-Assisted Labeling with Label Studio 1.3.0
At Label Studio, we’re always looking for ways to help you accelerate your data annotation process. With the release of version 1.3.0, you can perform model-assisted labeling with any connected machine learning backend.
By interactively predicting annotations, expert human annotators can work alongside pretrained machine learning models or rule-based heuristics to more efficiently complete labeling tasks, helping you get more value from your annotation process and make progress in your machine learning workflow sooner.
You can perform ML-assisted labeling with many different types of data. Supplement your image segmentation and object detection tasks that use rectangles, ellipses, polygons, brush masks, and keypoints, even automatically inferring complex shapes like masks or polygons by interacting with simple primitives such as rectangles or keypoints.
Beyond image labeling use cases, you can also use ML-assisted labeling for your named entity recognition tasks with HTML and text, in case you want to automatically find repetitive or semantically similar substring patterns within long text samples.
Upgrade to the latest version and select Use for interactive preannotations when you set up an ML backend, or edit an existing ML backend connection and toggle that option to get started today!
Interactive preannotations with images
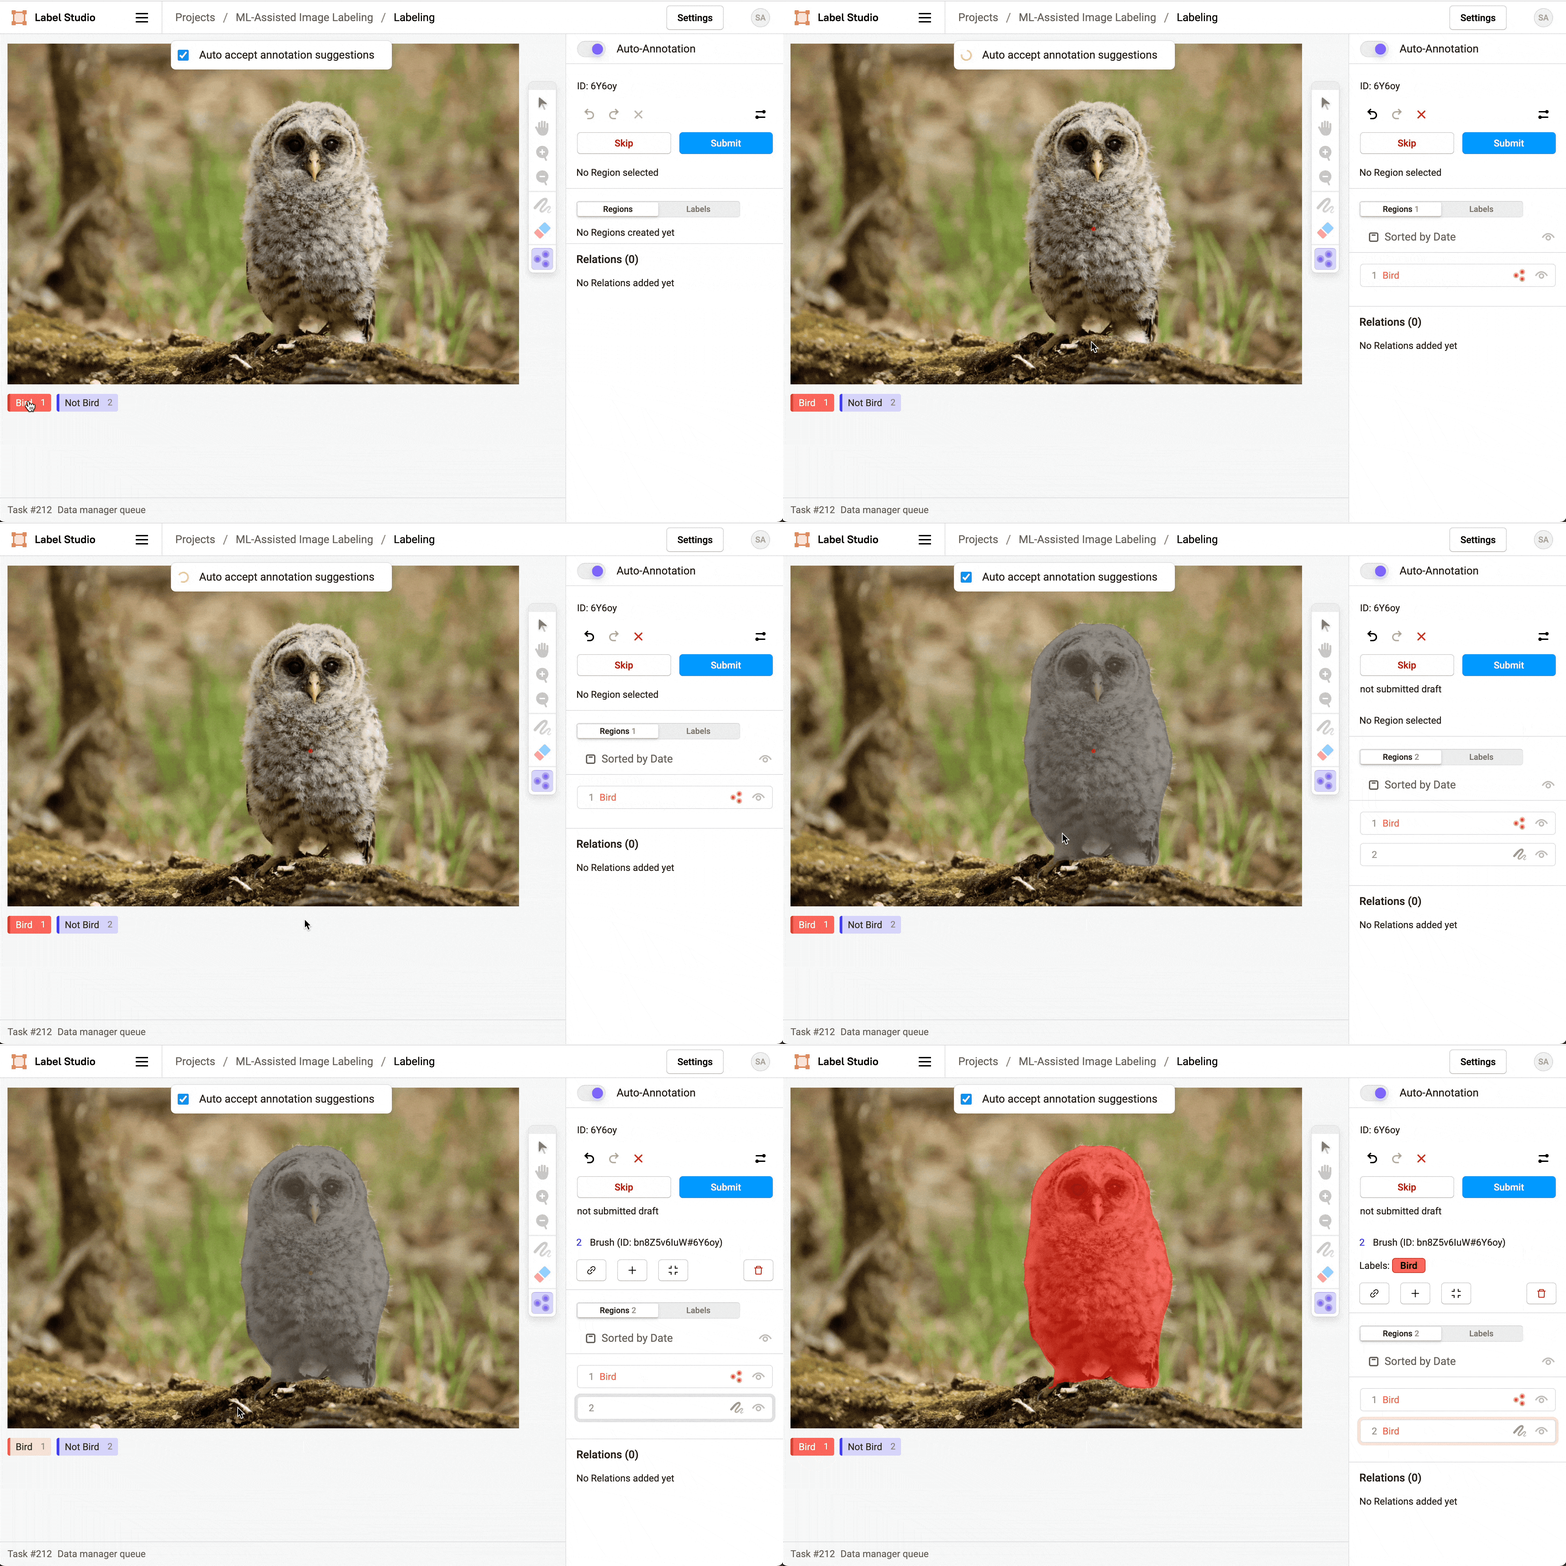
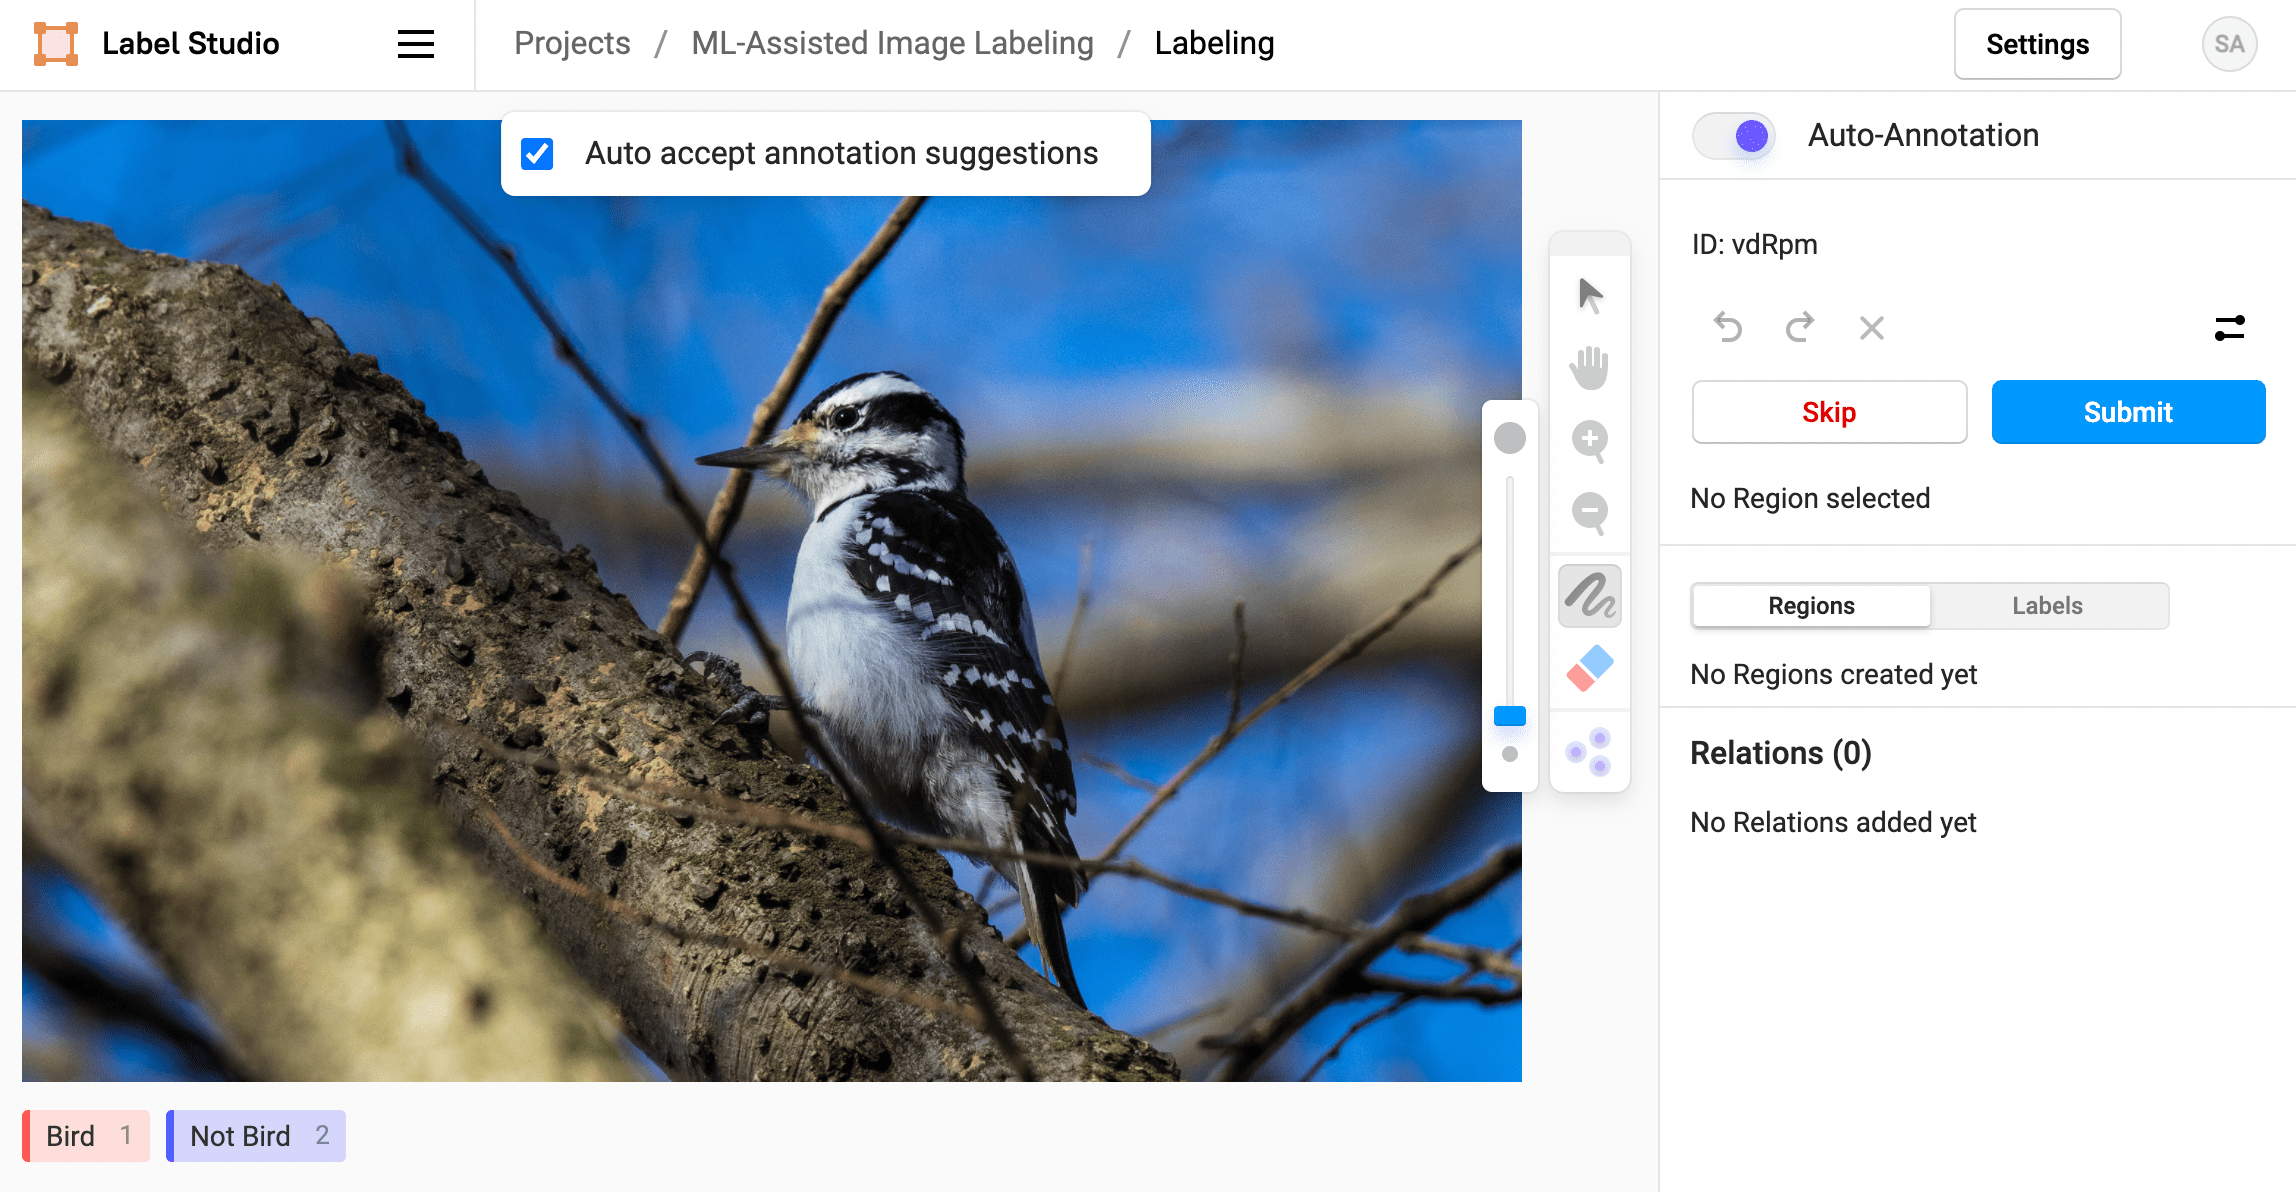
Set up an object detection or image segmentation machine learning backend and you can perform interactive pre-annotation with images! For example, you can send a keypoint to the machine learning model and it can return a predicted mask region for your image.
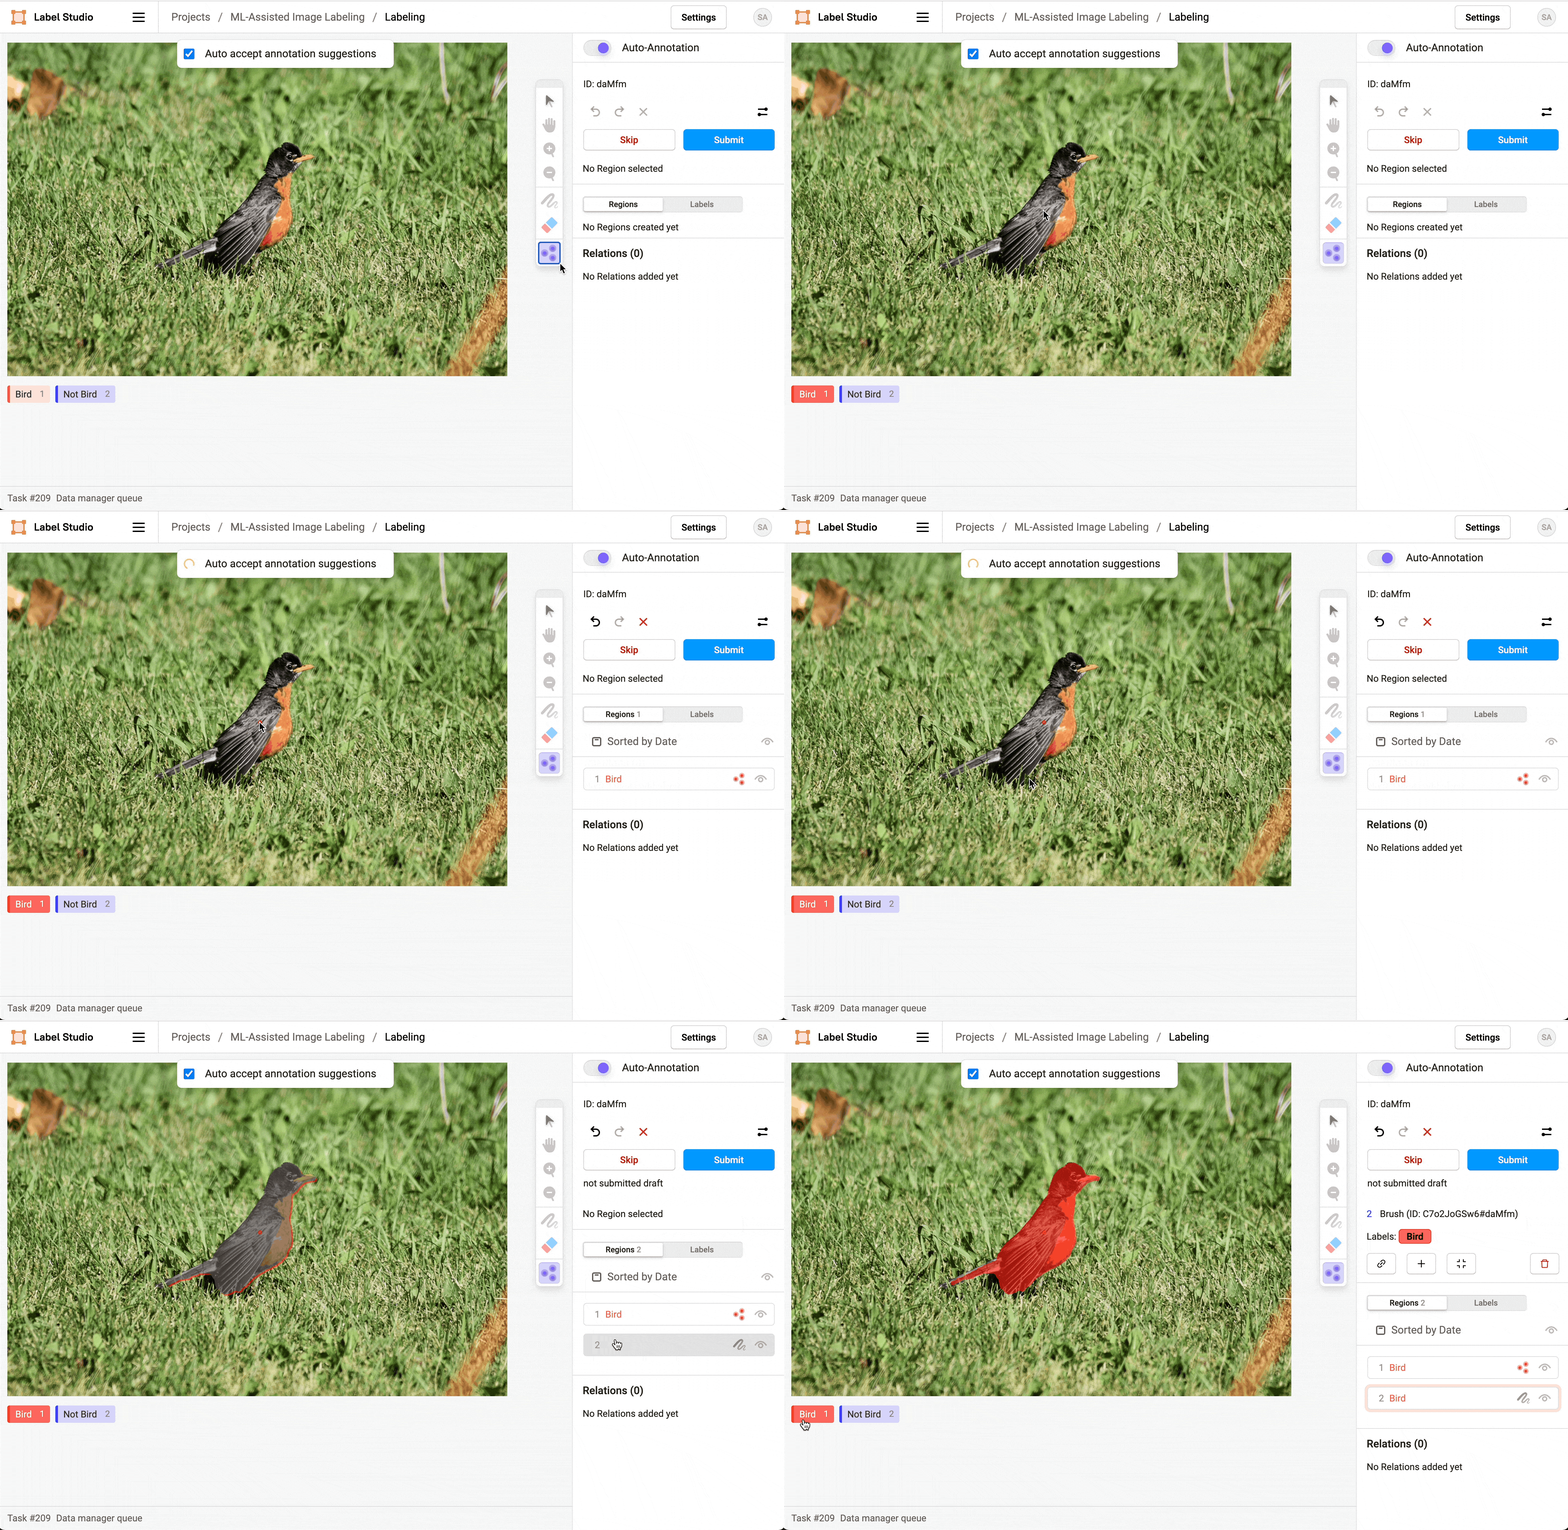
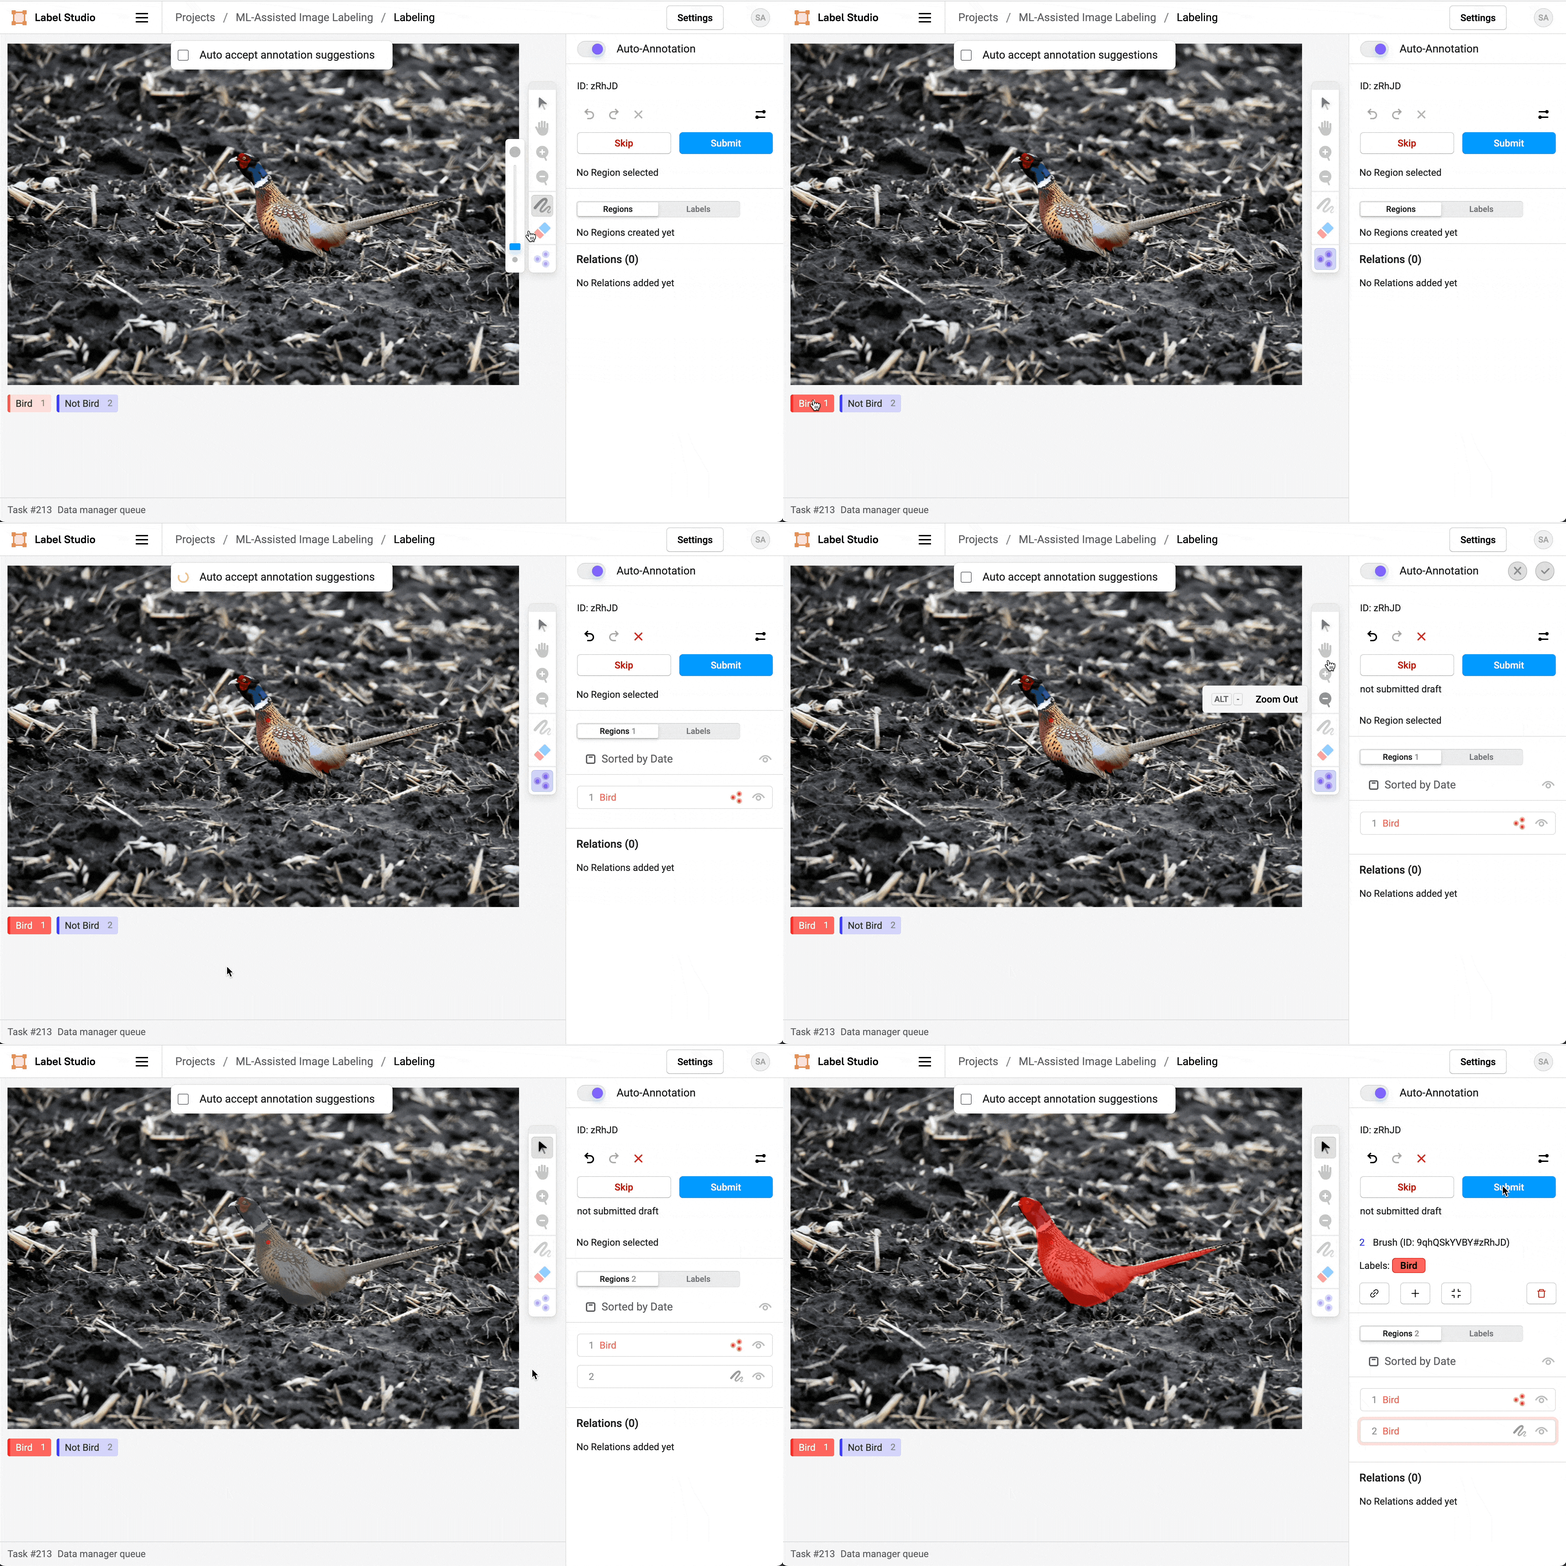
Depending on whether speed or precision is more important in your labeling process, you can choose whether to automatically accept the predicted labels. If you deselect the option to auto accept annotation suggestions, you can manually accept predicted regions before submitting an annotation.
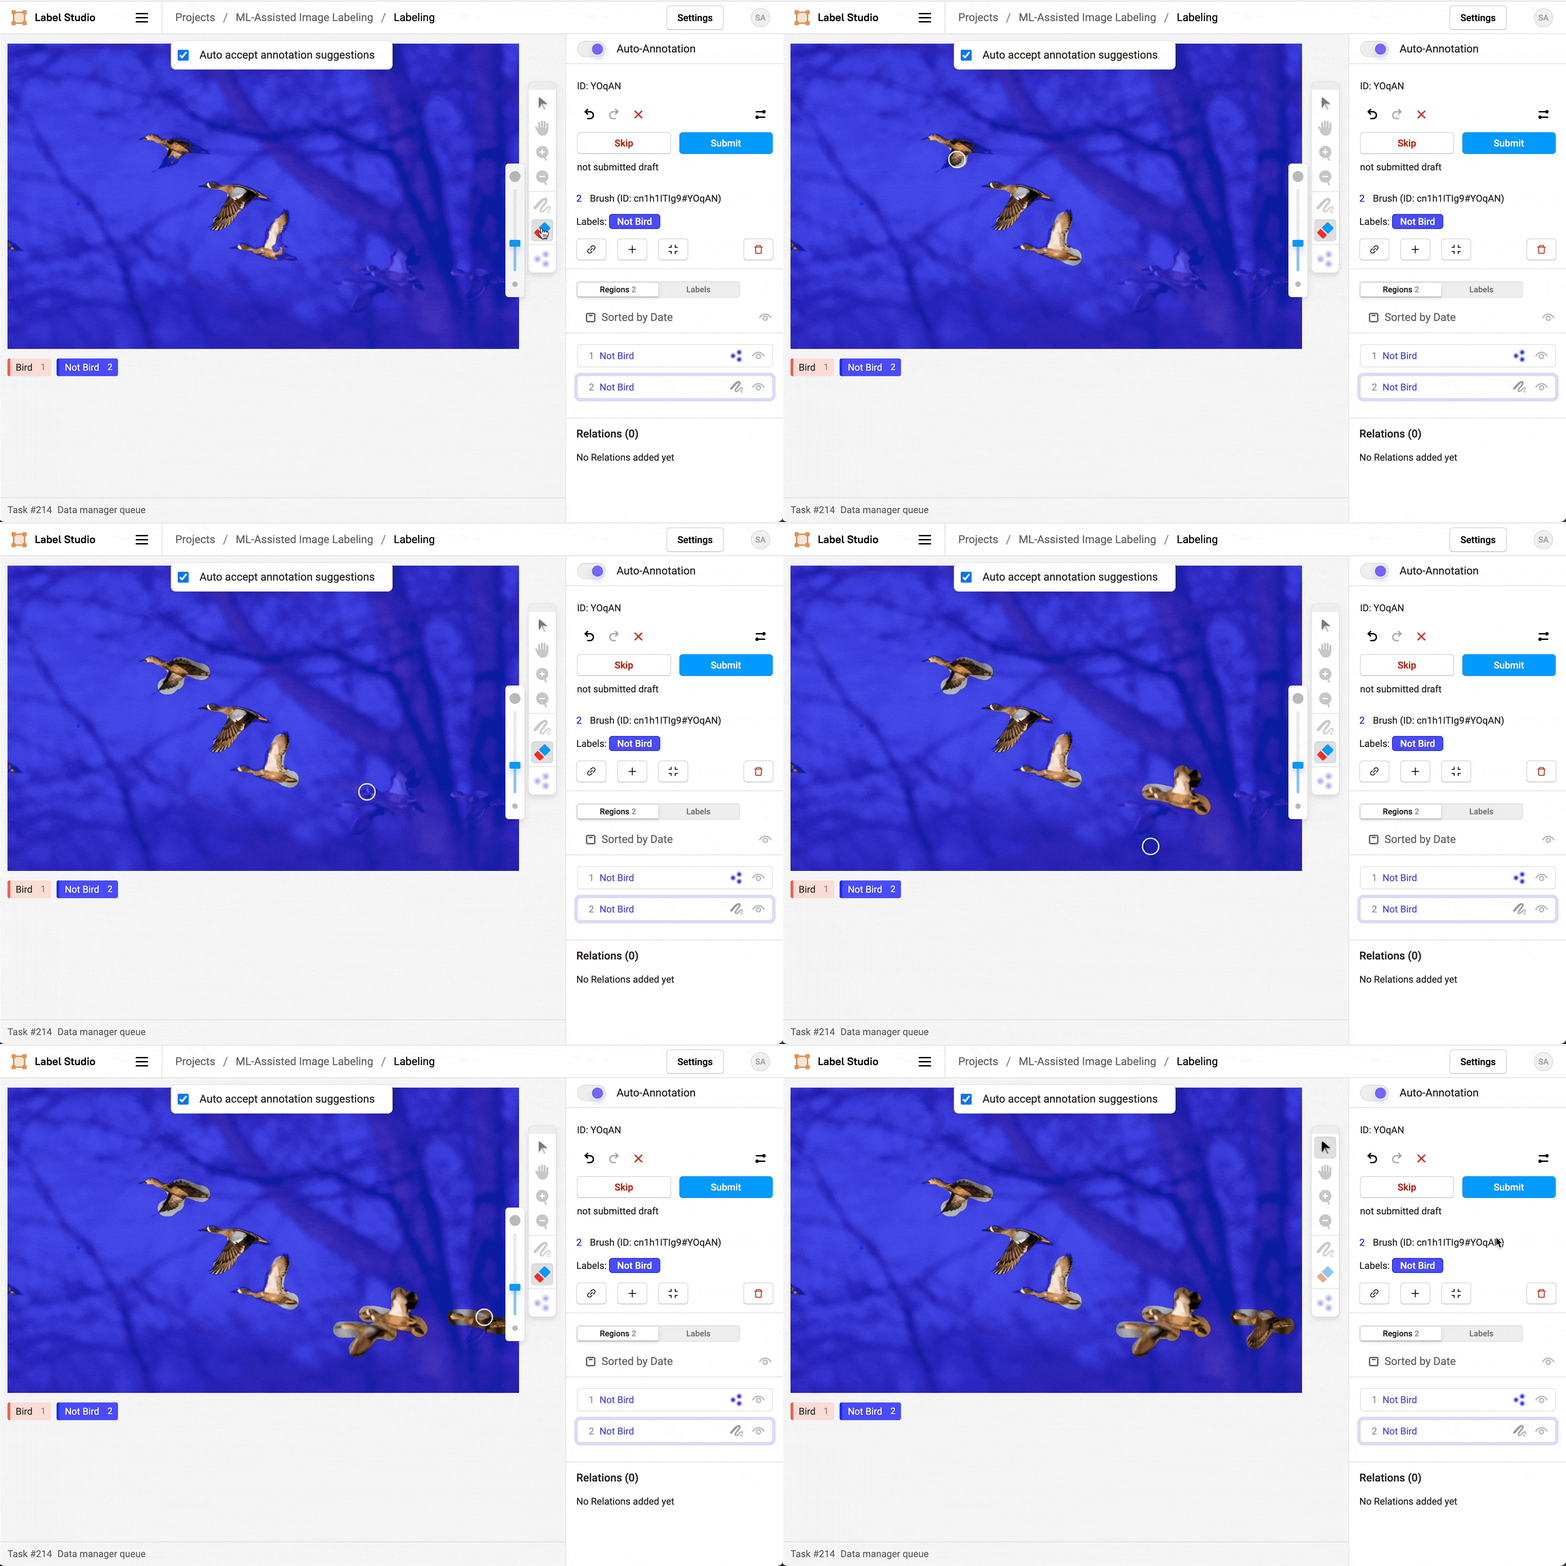
Of course, with the eraser tool (improved with new granularity in this release!) you can manually correct any incorrect automatically predicted regions.
Selective preannotation with images
If you only want to selectively perform ML-assisted labeling, that’s an option too! When you’re labeling, you can toggle Auto-Annotation for specific tasks so that you can manually label more complicated tasks.
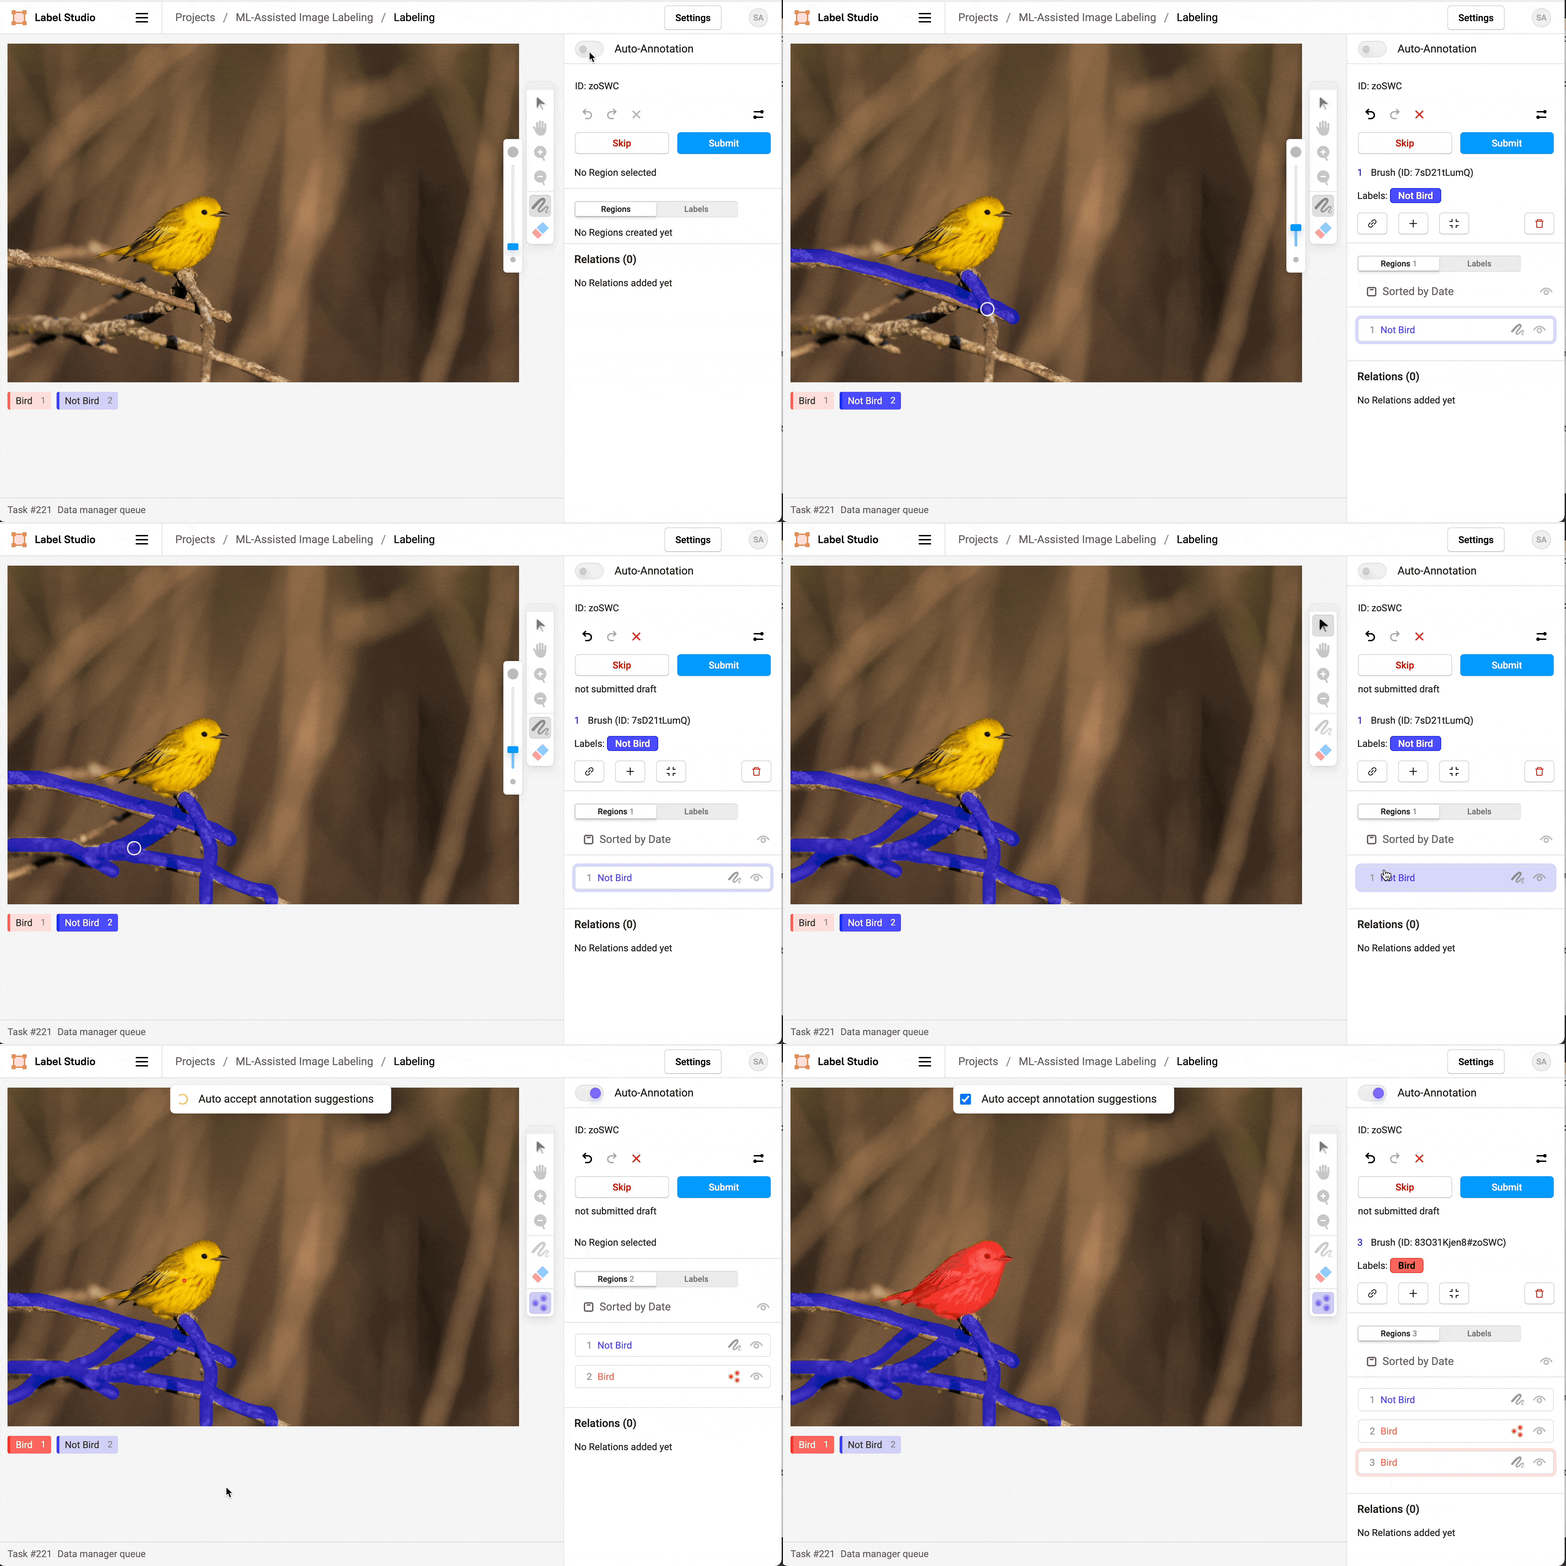
For example, with this labeling configuration, the Brush mask tool is visible for manual labeling and the KeyPoint labeling tool is visible only when in auto-annotation mode.
<View>
  <Image name="img" value="$image" zoomControl="true" zoom="true" rotateControl="true"/>
  <Brush name="brush" toName="img" smart="false" showInline="true"/>
  <KeyPoint name="kp" toName="img" smartOnly="true"/>
  <Labels name="lb" toName="img">
    <Label value="Bird"/>
    <Label value="Not Bird"/>
  </Labels>
</View>
This lets you create traditional brush mask annotations for some tasks, or use the smart keypoint labeling tool to assign keypoints to images and prompt a trained ML backend to predict brush mask regions based on the keypoints.
Interactive pre-annotations for text
You can also get interactive pre-annotations for text or HTML when performing named entity recognition (NER) tasks. For example, if you have a long sample of text with multiple occurrences of a word or phrase, you can set up a machine learning backend to identify identical or similar text spans based on a selection. Amplify your text labeling efficiency with this functionality!
For example, you can label all instances of opossum in this excerpt from Ecology of the Opossum on a Natural Area in Northeastern Kansas by Henry S. Fitch et al. using the Text Named Entity Recognition Template.
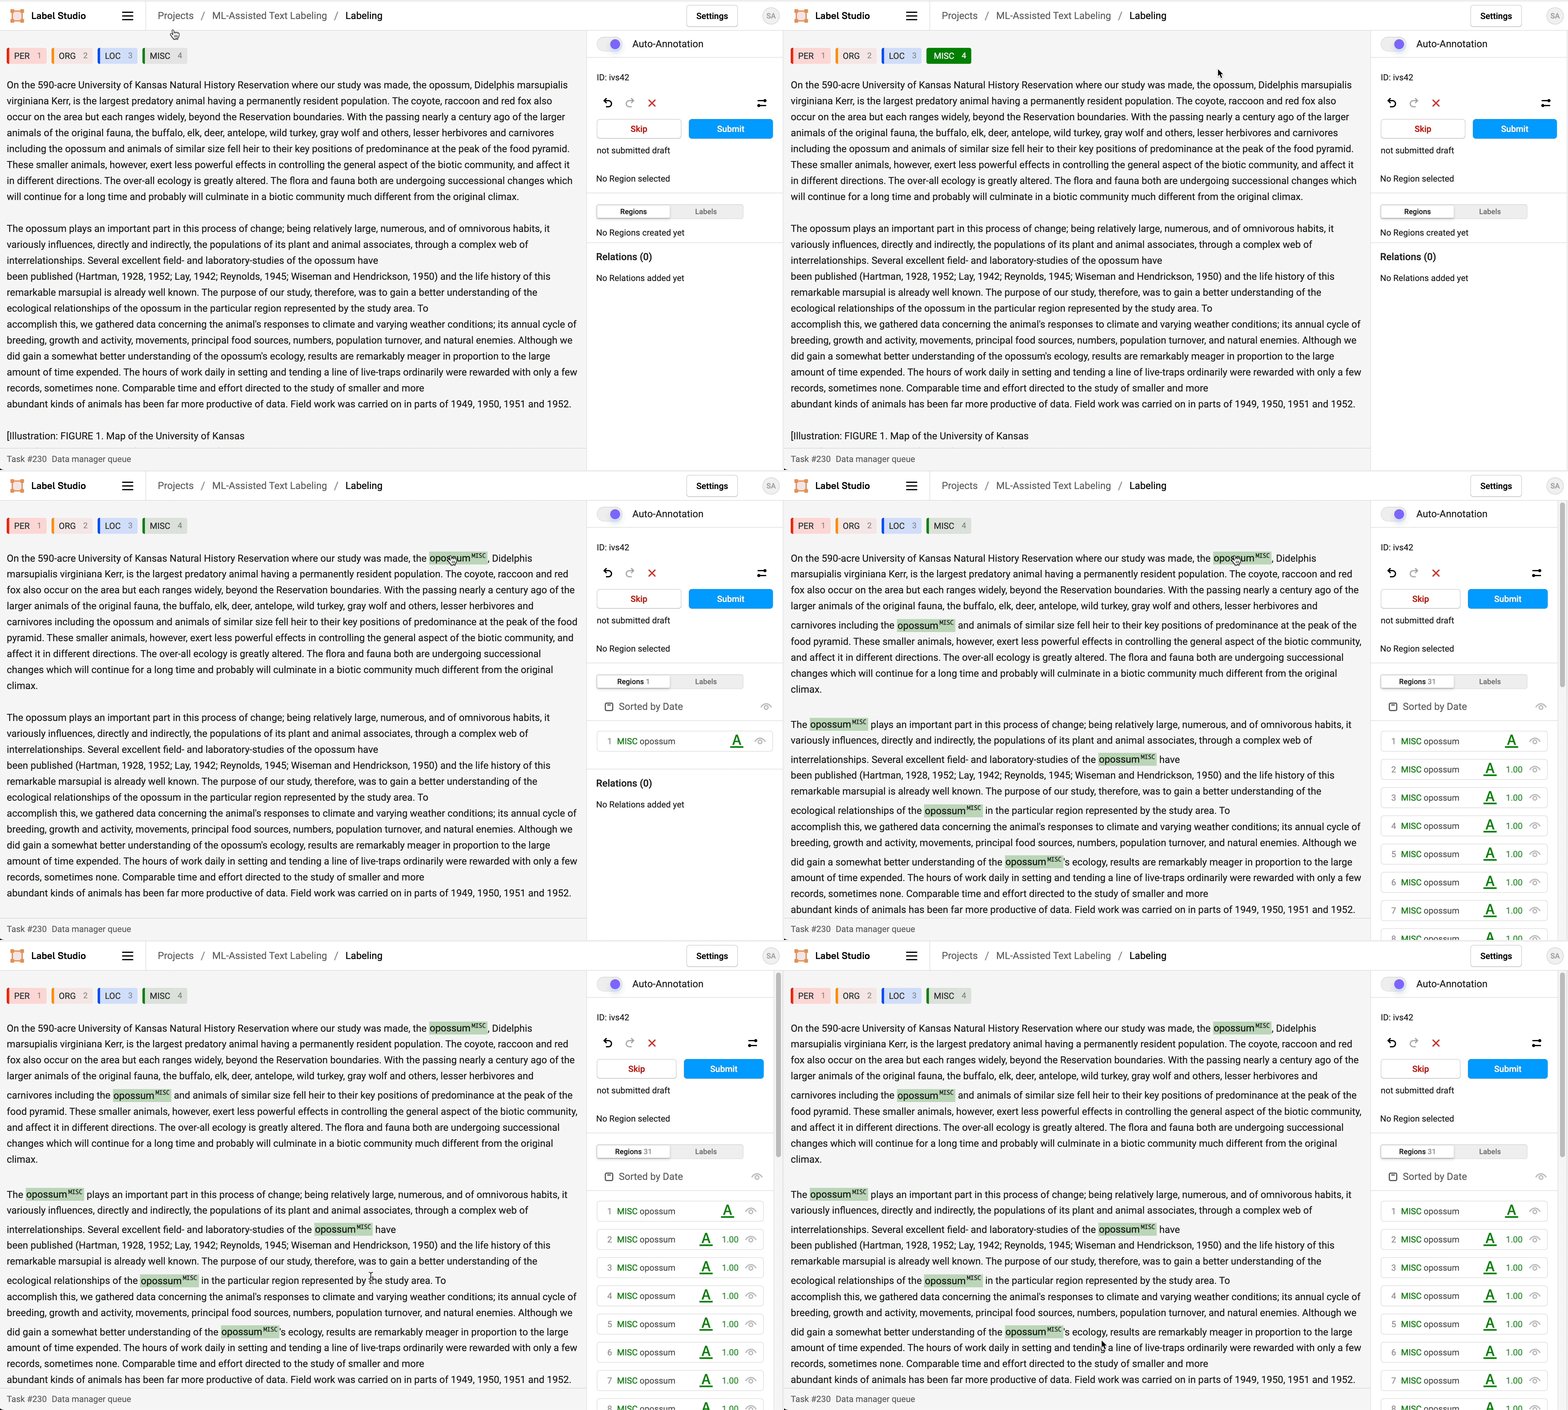
You can try this yourself by downloading this example machine learning backend for substring matching, or take it to the next level using a more sophisticated NLP model like a transformer. See more about how to create your own machine learning backend
Install or upgrade Label Studio and start using ML-assisted labeling with interactive preannotations today!
Other improvements
ML-assisted labeling is the most exciting part of this release, but it’s not the only improvement we’ve made. We improved the functionality of the filtering options on the data manager, and also improved semantic segmentation workflows. We also added new capabilities for exporting the results of large labeling projects by introducing export files. Start by creating an export file and then download the export file with the results.
Check out the full list of improvements and bug fixes in the release notes on GitHub.
